If you encounter any problems with the tutorial, please feel free to contact our support team via email at support@myautodata.com We will try to get back to you within 24 hours.
Enter and enable contact data and vehicle data
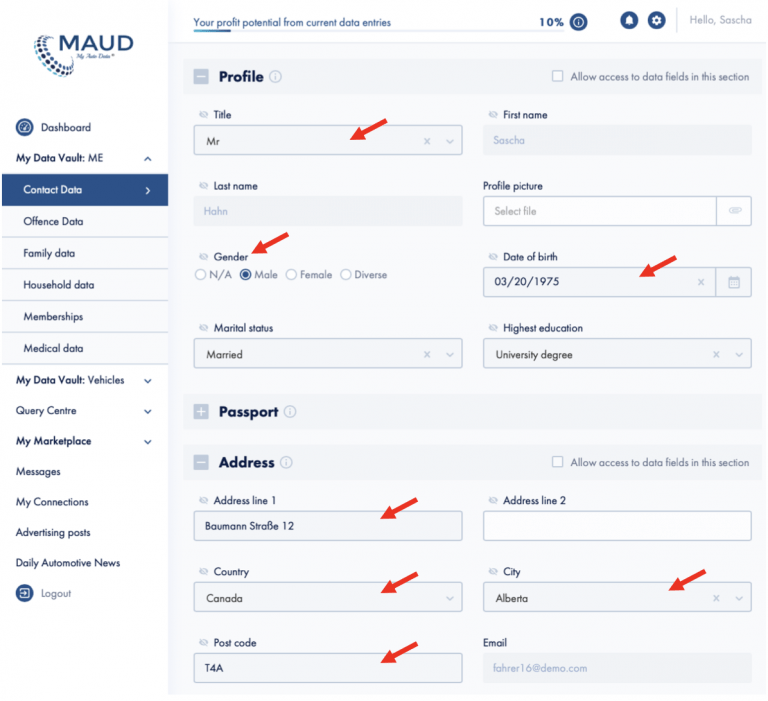
Step 1: My Data Vault - contact data → profile and address
Profile: Enter title, gender and date of birth
Adress: Enter country, city and post code
Step 2: My Data Vault – Vehicles
a) Select Add Automobile
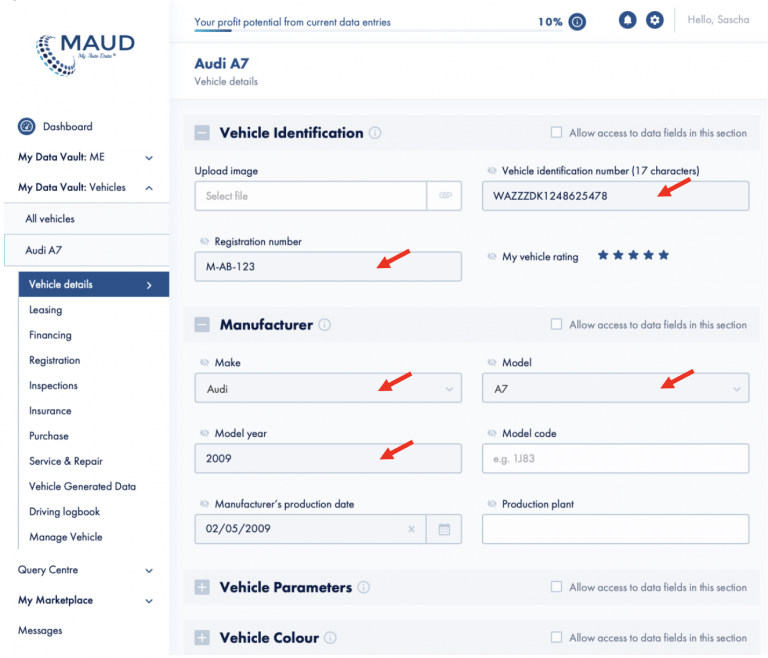
b) Enter car data
b1) Vehicle details → Vehicle identification→ Enter data fields Vehicle identification number (VIN) and registration number
b2)Vehicle details→ manufacturer→ Enter data fields make, modelandmodel year
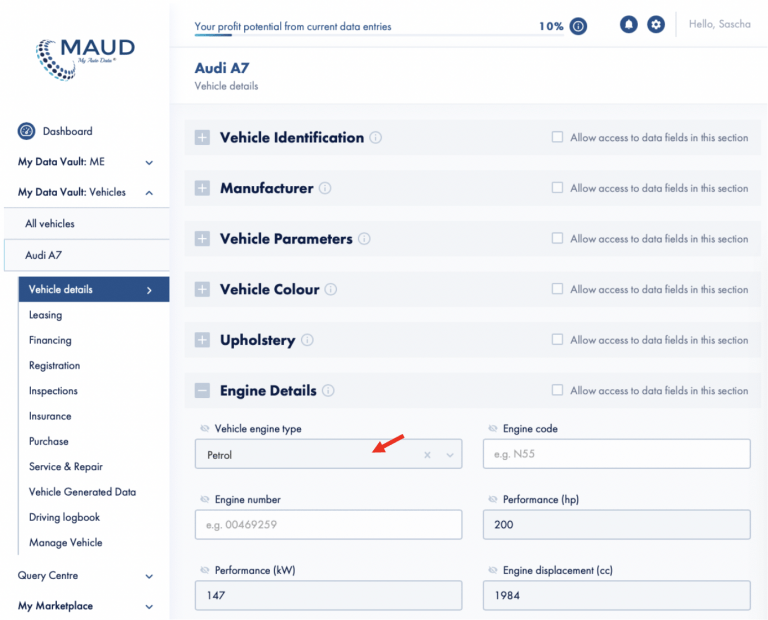
b3) Vehicle details→ Engine details → Enter data field Vehicle engine type
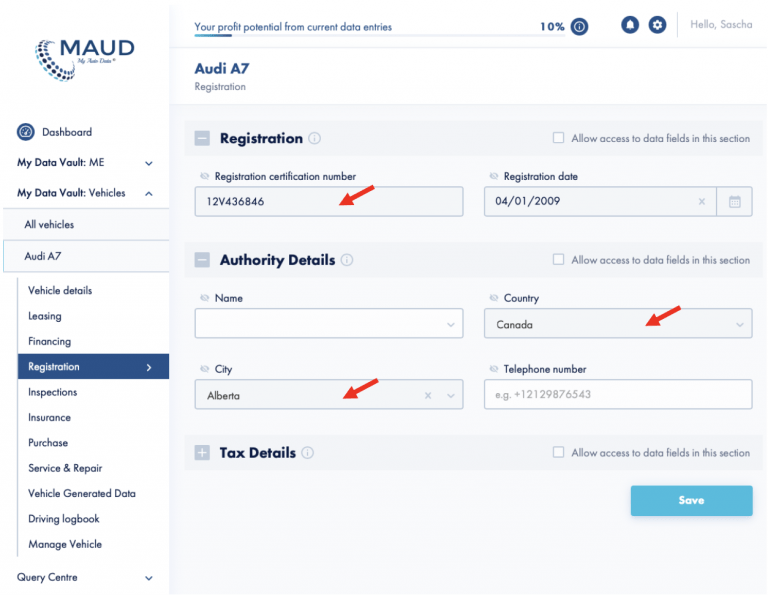
c) Enter and unlock registration
c1)Registration → Enter data field Registration certification number
c2) Registration → Authority details → Enter country and city
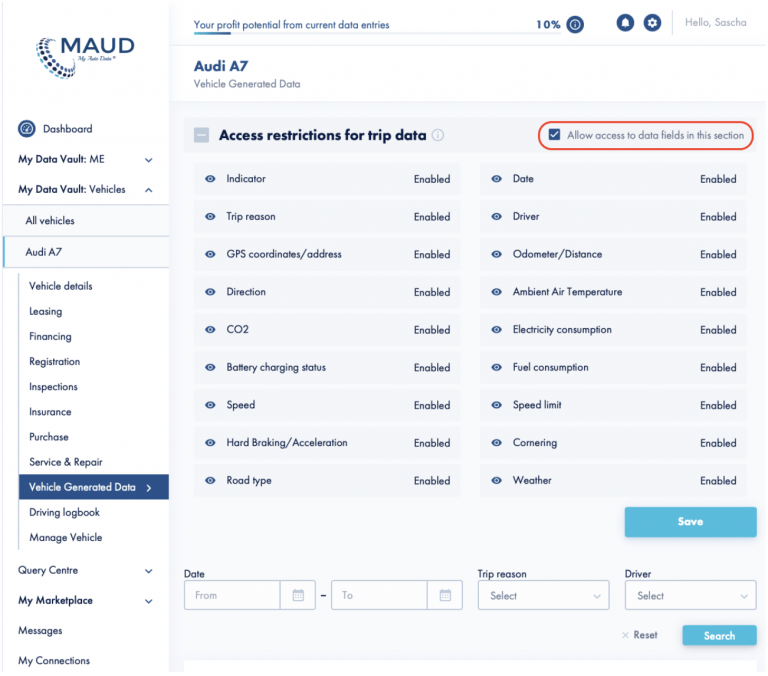
d) Vehicle generated data
Vehicle generated data → Access restrictions for trip data → Allow access to data fields
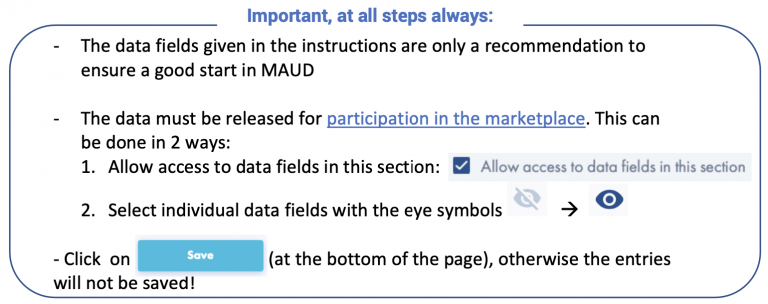
(If you want to participate in the marketplace and have a premium membership, we recommend that you enable these data fields)
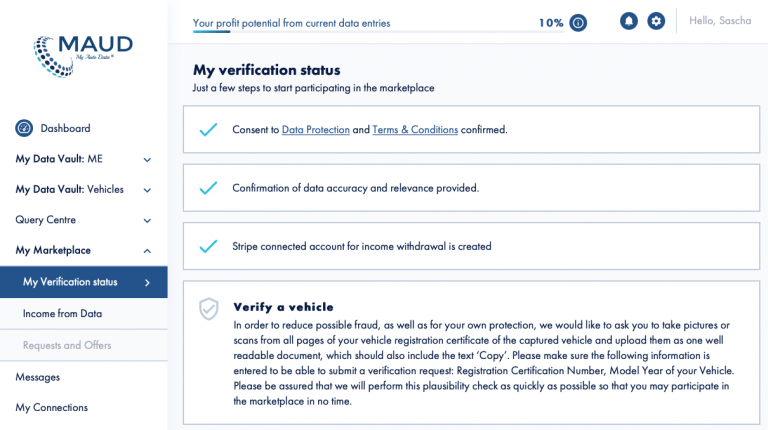
Step 3: Verification
My Marketplace → My verification status
Data protection and terms and conditions → click “confirm”
Data accuracy and relevance → click “confirm”
Connected account → click „Connect with stripe“
Follow procedure in stripe (Redirect to Stripe website)
Accept payments from MyAutoData GmbH
Enter data fields country, mobile number and e-mail and click “next”
You will receive an SMS with a code that is needed for the verification of your Stripe account
Personal details → Accept entriesor enter data if these have not previously been entered in MAUD
Company details → Company website → Entermyautodata.com
Select account for withdrawals → Enter currency, country of bank account and IBAN
Check details → Click „Done“ → (Automatic redirect to My Marketplace, My Verification)
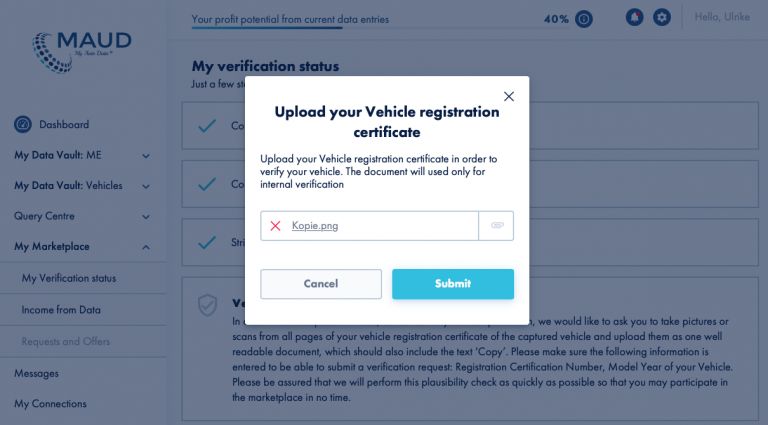
8. Click on “Verify”
In the following pop-up window, please be sure to upload a clearly legible photo of the opened vehicle registration document
9. Click “Submit”
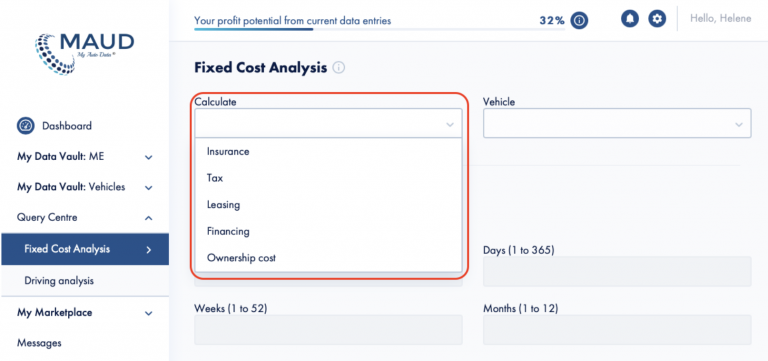
Fixed Cost Analysis
1. General overview
Query Centre → Fixed Cost Analysis
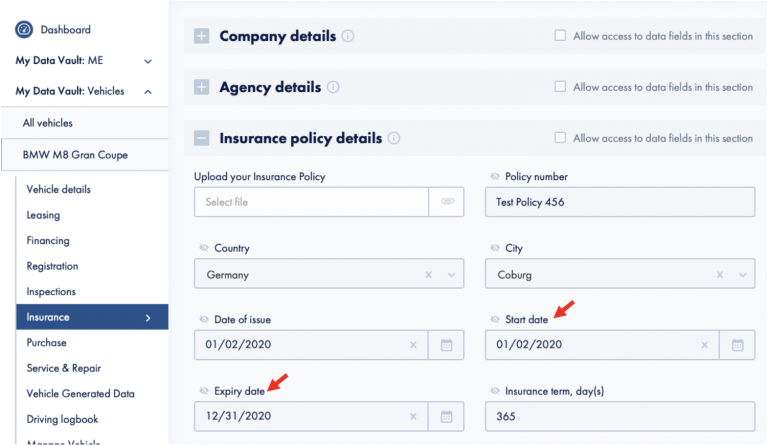
Insurance
Tax
Leasing
Financing
Ownership cost
2. Necessary data fields
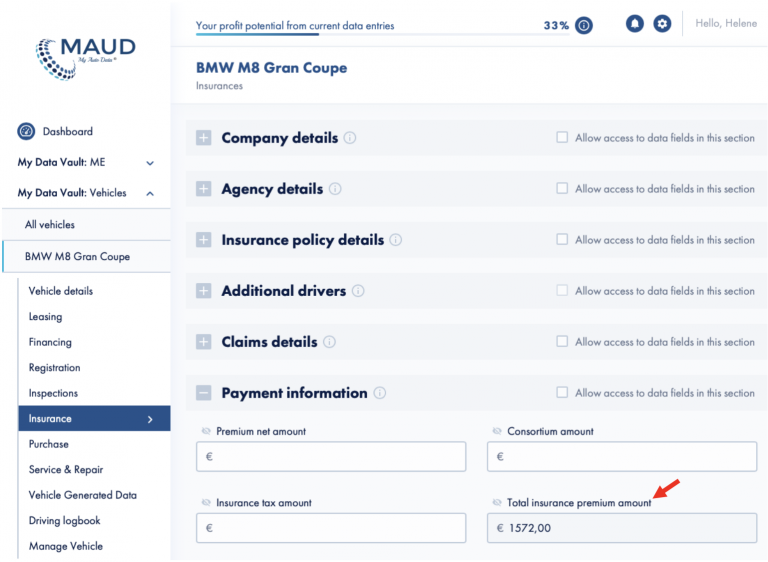
a) Insurance
My Data Vault: Vehicles → Insurance → Payment information → Total insurance premium amount
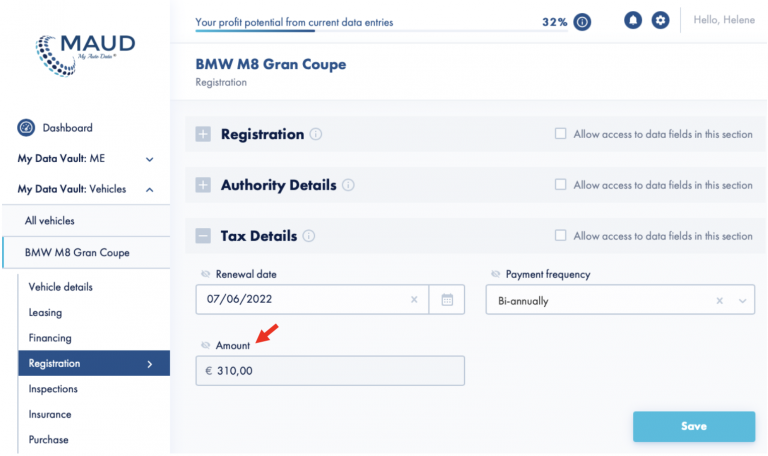
b) Tax
My Data Vault: Vehicles → Registration → Tax Details →Amount
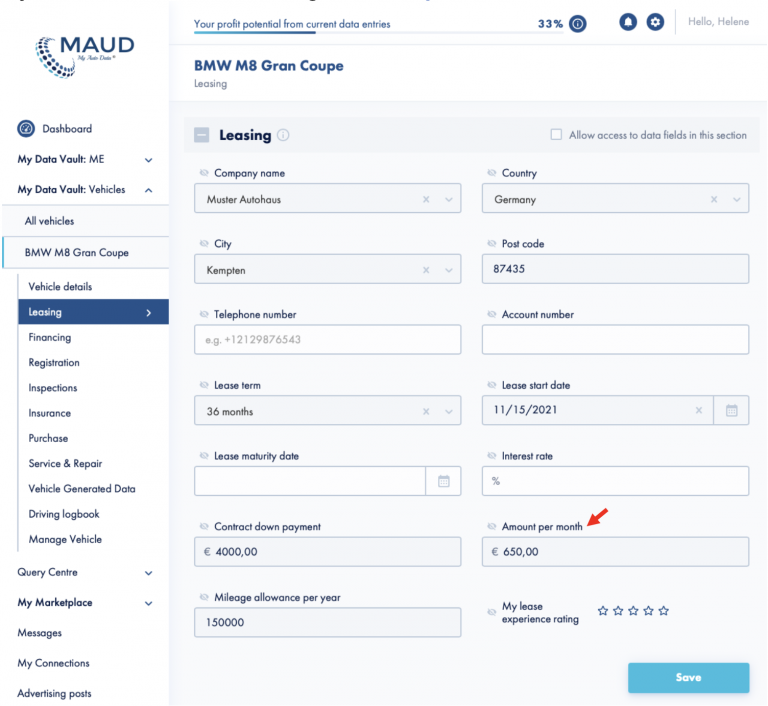
c) Leasing
(If the car was purchased via leasing)
My Data Vault: Vehicles → Leasing →Amount per month
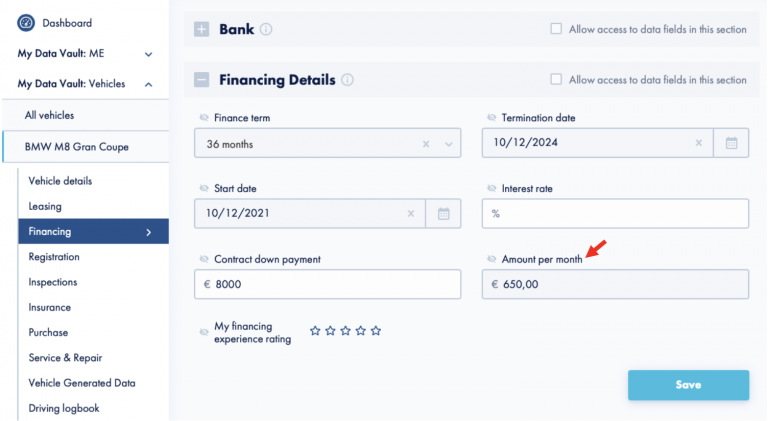
d) Financing
(If the car was purchased via financing)
My Data Vault: Vehicles → Financing → Financing Details →Start date and Expiry date
My Data Vault: Vehicles → Financing → Financing Details →Amount per month
e) Ownership cost
The cost that are selected for your time period are calculated:
Required data fields:
Tax
Insurance
Optional data fields if applicable:
Financing
Leasing
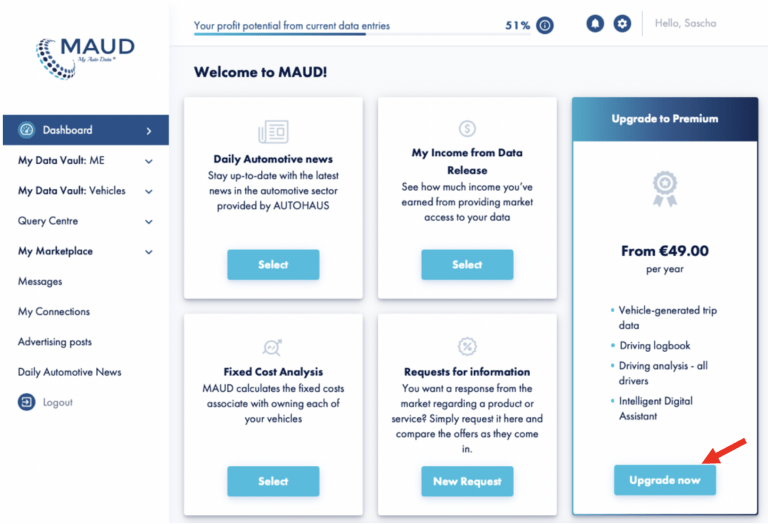
Upgrade to Premium
Step 1: Click on "Upgrade now" in the dashboard
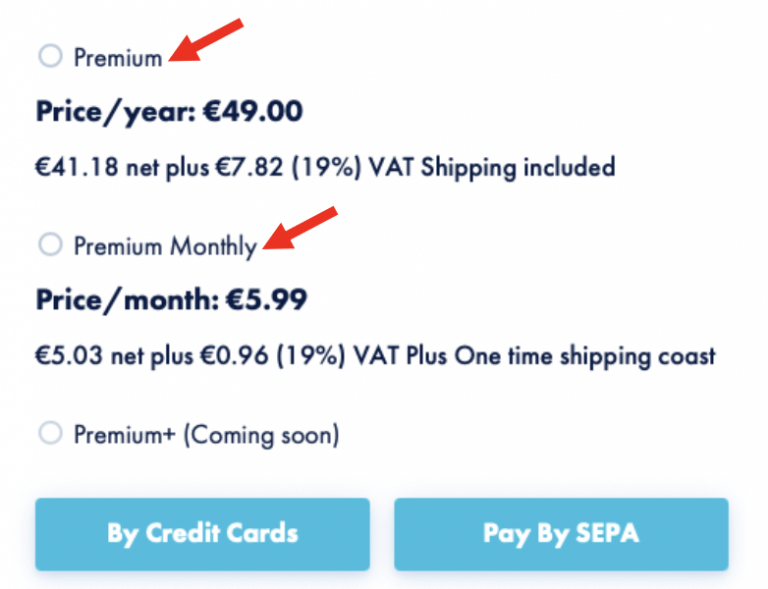
Step 2: Select Premium (yearly) or Premium Monthly
Step 3: Selection of payment by credit card or SEPA
After payment is completed, the premium membership is ready. Have fun with MAUD – Premium!
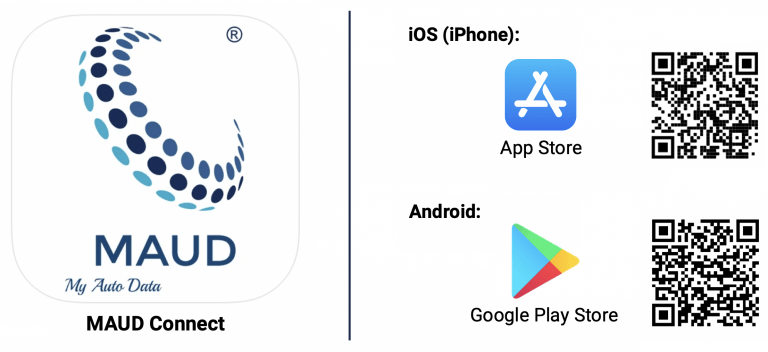
MAUD-Connect App
Important notes for the use of the app:
Position the cell phone in a non-slip manner after activating the MAUD-Connect app and before starting the journey.
As required by law, the operation of the cell phone while driving is prohibited and MyAutoData GmbH assumes no liability
Requirements of the use of the app (absolutely necessary):
Mobile phone with data plan
GPS-location enabled in the mobile phone
Bluetooth activated
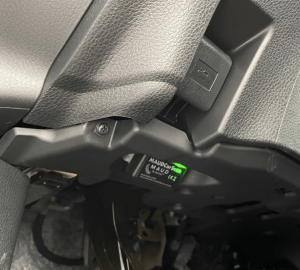
Step 1: Plug MAUD-Adapter into OBD socket
It is typically located on the driver’s side on the left below the dashboard in the footwell (see reference image).
If you need extra information: How do I find the socket in my vehicle ? www.wikiobd.co.uk/
Step 2: Download and open MAUD Connect App
Step 3: Location "always allowed"
The app needs your permission to identify the driving route.
Location instruction – When opening the app for the first time, please select the following:
iOS (iPhone)
Allow when using the app
Select “always allowed”
Android
Swipe down from the top-edge of the display
Keep pressed location gedrückt. If location is not shown:
Click on edit ✎ or settings ⚙. Drag location in to the quick settings.
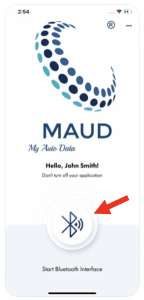
The app then automatically connects with the OBD adapter
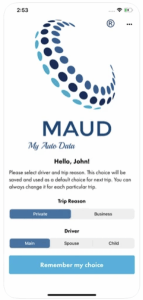
Step 6: Trip reason, driver
Trip Reason:
Private: Ride serves a private purpose
Business: Ride serves a business purpose (e.g. drive to work)
Driver: Choose, who does the drive
Remember my choice: default setting until next change
Important Note: If trips are made by the spouse or child, they must use their own cell phones with their own MAUD Connect app! Otherwise, the driving data would be mixed with each other and therefore unusable! However, the access data for the login are always identical with those of the vehicle owner (Main)
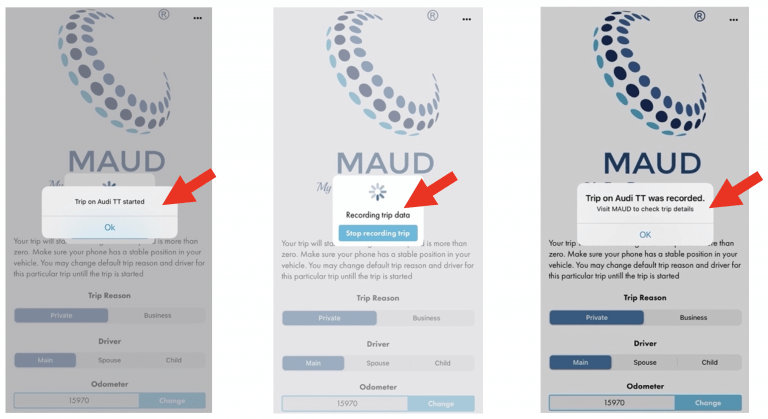
Step 7: Check odometer, start and end trip
Before the very first trip, take the mileage from the car’s odometer and enter it into the app.
After several trips, sporadically check whether the mileage in the vehicle still matches that in the app. If necessary, correct the mileage in the app before starting the trip. To do that: Type in the new number and click „Change“ → a blue frame around the mileage indicates that the change has been made.
Start trip:
Recording starts automatically as soon as the vehicle is in motion. Display: „Trip on xxx started“.
After that, the display automatically changes to “Recording trip data” which means that the trip is currently being recorded.
End trip:
Optional automatic or manual:
Automatic: 2 minutes after the engine is switched off
Manual: Click “Stop recording trip” before switching off the motor!
Daraufhin wird die Fahrt automatisch beendet und in dem System gespeichert
Feld: „Trip on car was recorded“
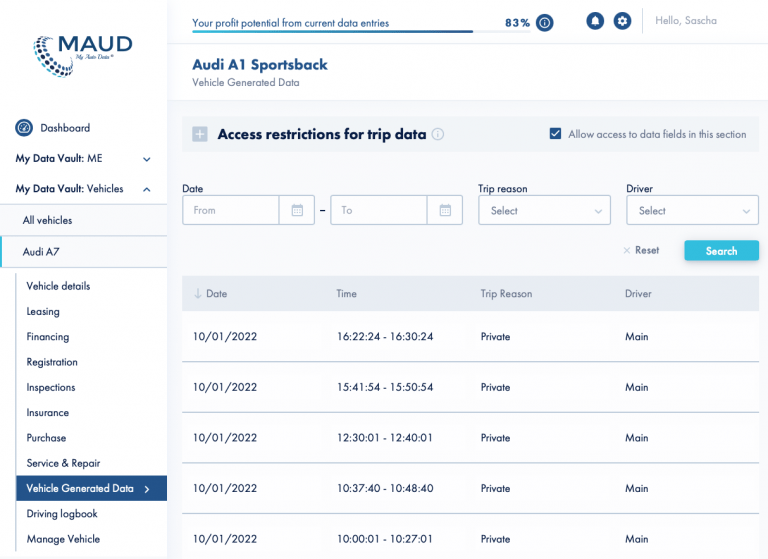
Step 7: Show trips in MyAutoData
Login at myautodata.com einloggen. My Data Vault: Vehicles → Select vehicle→ click on Vehicle generated data